How to Review & Edit Metadata
Audience: Archivists — people reviewing, correcting, and curating the structured metadata extracted from contributor responses.
The Metadata tab is where you turn contributor memories into a clean, verified record for every item in your batch. Keyboard shortcuts make it fast — you can review a full batch without touching the mouse.
What Is "Curated Metadata"?
After contributors respond, Zeuge uses AI to extract structured fields from their words:
- Date — when the photo was taken
- Location — where it was taken
- People — names mentioned or visible
- Tags — themes and topics
- Description — short factual description
- Stories — anecdotes and narrative context
Automatically extracted values are called "auto" fields. Override any of them and they become "manual" — locked and preserved even if you recompute.
Step 1 — Open the Metadata Tab
From your batch detail page, click "4 — Metadata" in the progression stepper.
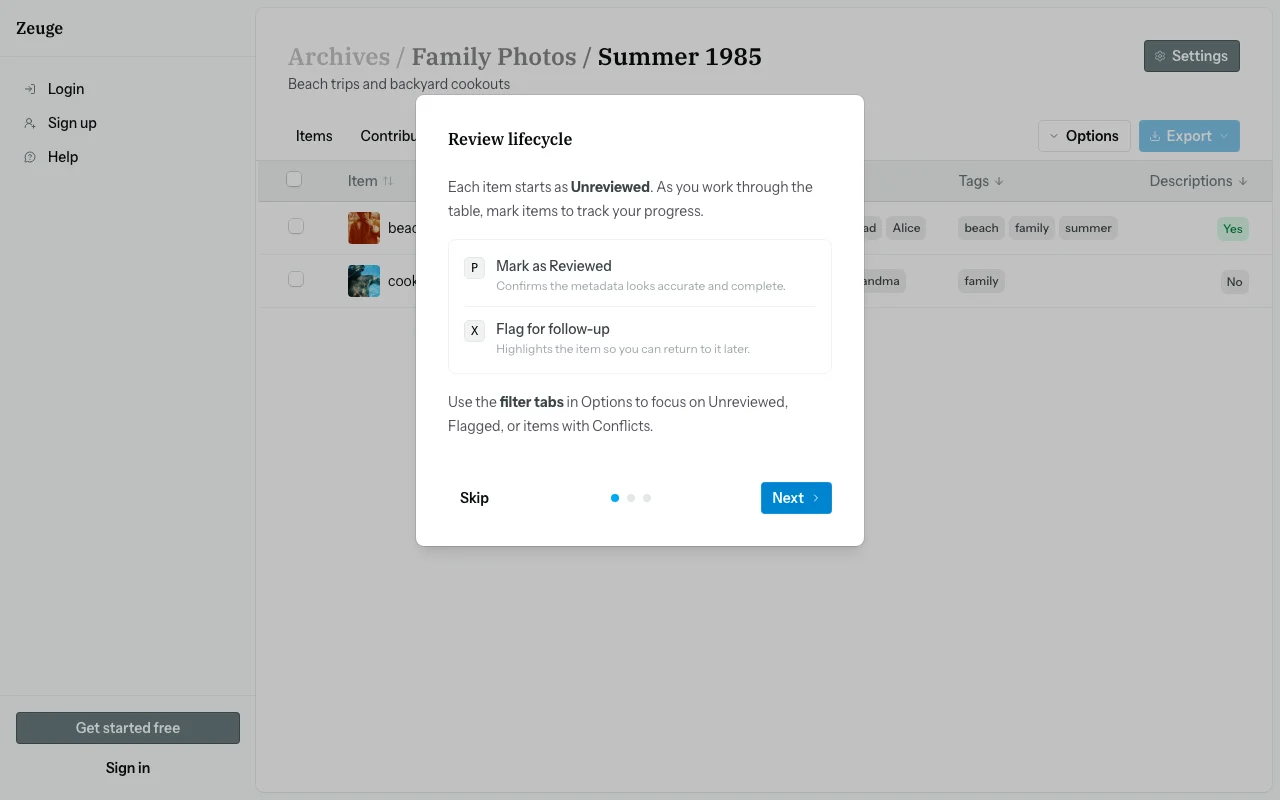
First time here? A 3-step walkthrough opens automatically to introduce the review workflow. Read through it — it explains statuses, source cards, and normalization. You can reopen it any time from Options → How it works.
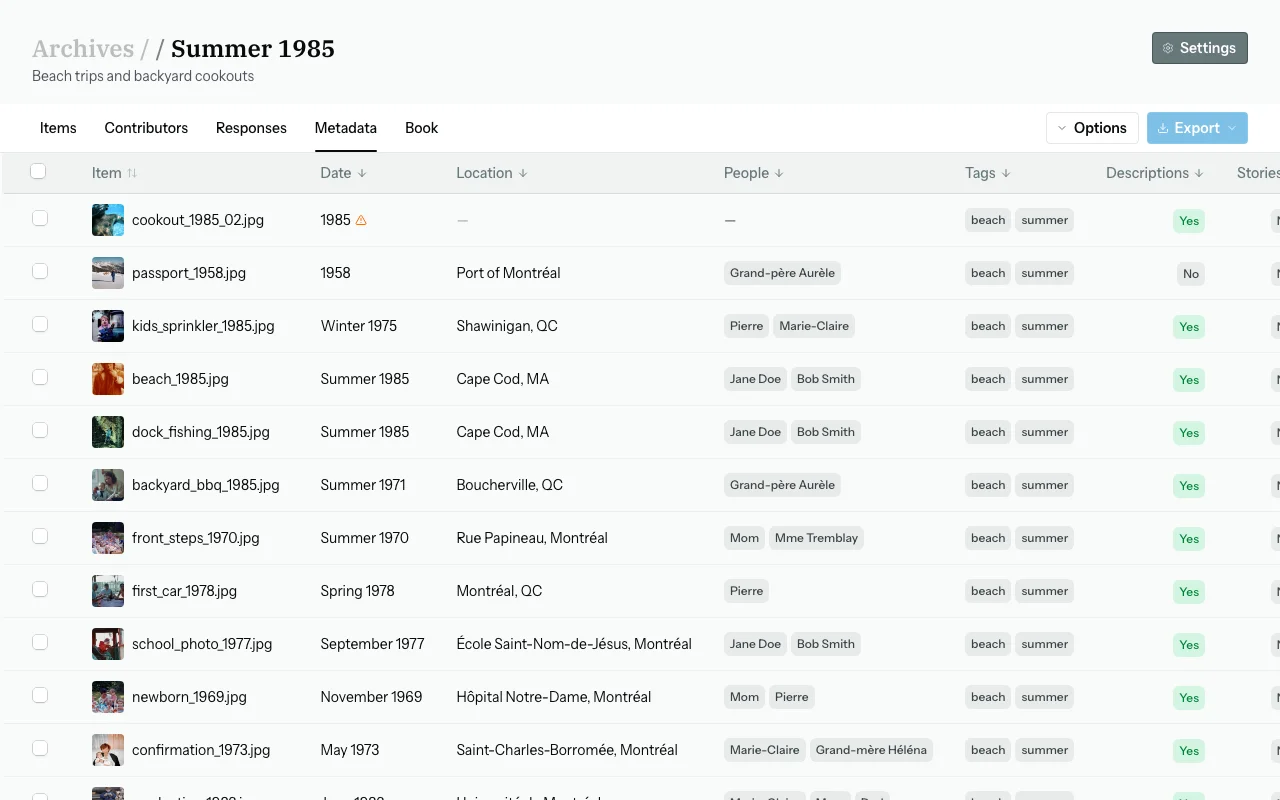
Step 2 — The Metadata Table
The tab shows a table — one row per item. Each row shows:
- Item thumbnail and filename
- Extracted date, location, and people
- Review status badge: Unreviewed, Reviewed, or Flagged
- Completeness indicator — how many of date, location, and people are filled in
Navigate rows with ↑ / ↓ and press Esc to close the drawer.
Step 3 — Filter the Table
Use Options → Filters or keyboard shortcuts to narrow your view:
| Filter | Shortcut | Shows |
|---|---|---|
| All | Shift+A | Every item |
| Conflicts | Shift+C | Items with conflicting contributor values |
| Incomplete | Shift+I | Items missing date, location, or people |
| Flagged | Shift+F | Items you have flagged |
| Unreviewed | Shift+U | Items not yet reviewed |
Step 4 — Open an Item
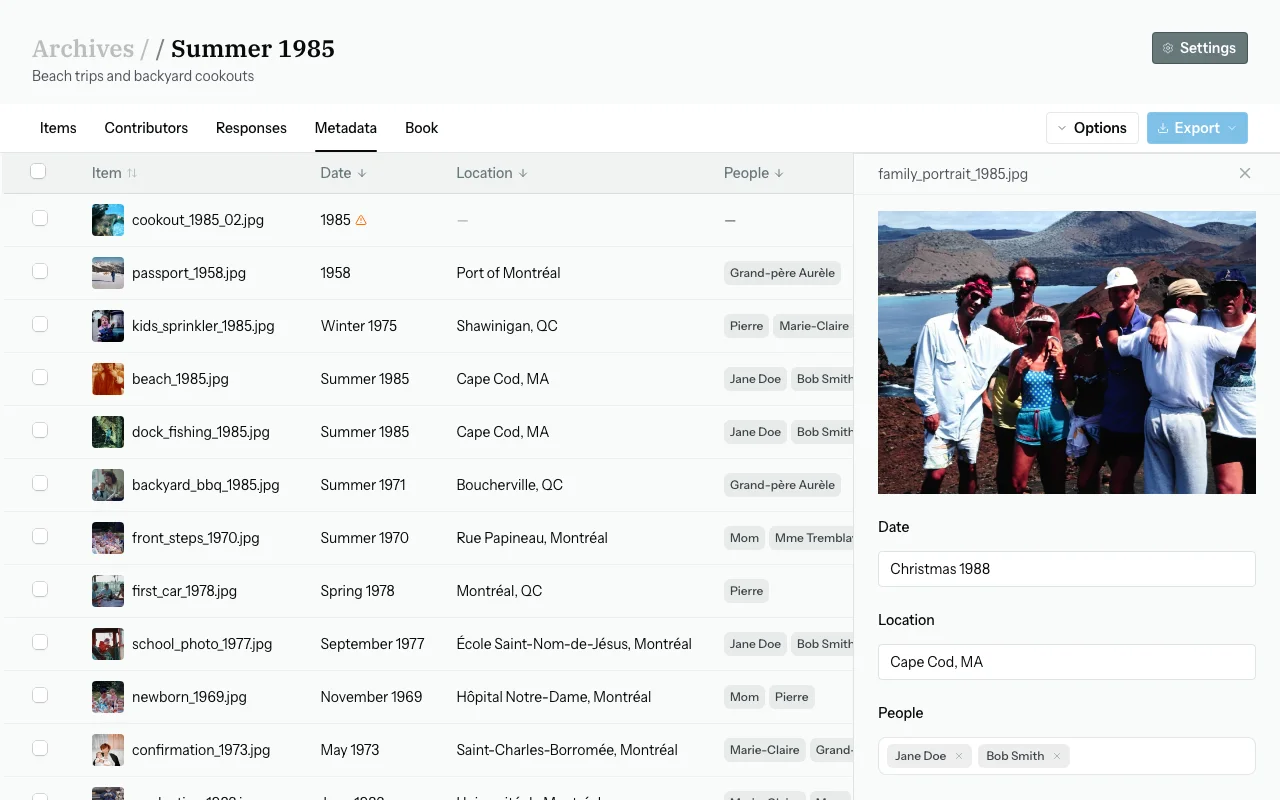
Click any row (or press Enter) to open the row drawer on the right. It shows all six metadata fields with source badges (auto or manual), plus contributor source cards below each field.
Step 5 — Adopt a Contributor's Value
Below each field in the drawer, you'll see source cards — one per contributor who mentioned something relevant. Each card shows the contributor's name and their extracted value.
Click Apply on a source card to adopt that contributor's value as the curated value for the field.

Step 6 — Edit a Field Manually
- Click any field value to enter edit mode.
- Text fields (Date, Location, Description, Stories): type your value.
- Chip fields (People, Tags): type and press Enter to add; click × to remove.
- Click Save.
The field becomes "manual" and won't be overwritten by future recomputes.
Step 7 — Set Review Status
| Status | Keyboard | When to use |
|---|---|---|
| Reviewed | P | Metadata verified and complete |
| Flagged | X | Needs attention, more input, or has a conflict |
| Unreviewed | U | Reset to default |
Aim to mark everything Reviewed before exporting. The Unreviewed filter (Shift+U) shows what's left.
Step 8 — Resolve Conflicts
When contributors gave different values for the same field, a conflict indicator appears on the row. In the drawer, look for the conflict alert next to the field and use the source cards to choose which value to keep (or type your own). Click Save.
Step 9 — Bulk Actions
Press Space to select/deselect the focused row. A floating bulk action bar appears at the bottom when rows are selected.
| Action | Shortcut | What it does |
|---|---|---|
| Date | D | Set date for all selected items |
| Location | L | Set location for all selected items |
| Mark Reviewed | — | Mark all selected as reviewed |
| From EXIF | — | Populate from embedded EXIF data |
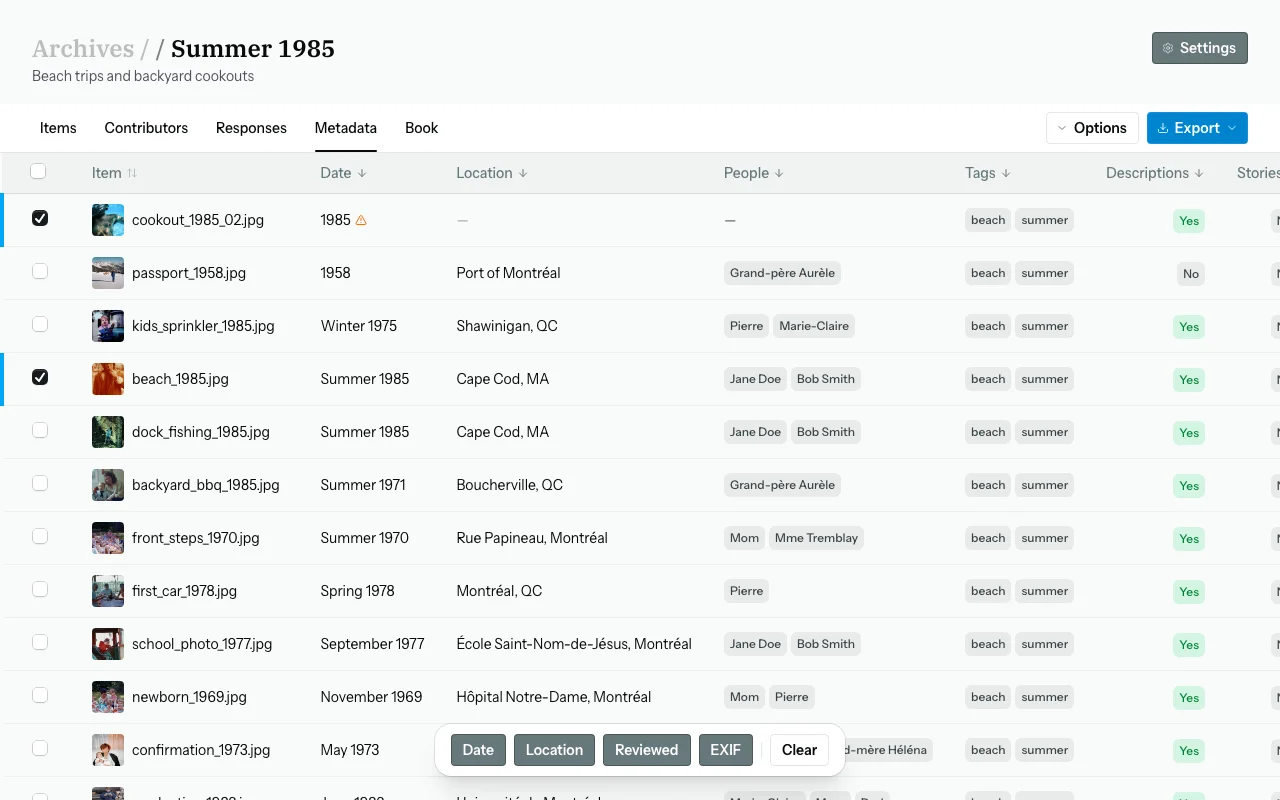
EXIF Columns
Toggle EXIF columns (date, GPS, camera model) with Shift+E or Options → Show EXIF columns. Use the "From EXIF" bulk action to bulk-populate metadata from EXIF data.
Keyboard Shortcuts Quick Reference
| Shortcut | Action |
|---|---|
| ↑ / ↓ | Navigate rows |
| Esc | Close drawer / deselect all |
| P | Mark reviewed |
| X | Mark flagged |
| U | Mark unreviewed |
| Space | Select / deselect row |
| D | Bulk set date |
| L | Bulk set location |
| Shift+E | Toggle EXIF columns |
| Shift+A/C/I/F/U | Apply filters |
Full reference: Options → Keyboard shortcuts or the Keyboard Shortcuts article.
Exporting Metadata
Via Options → Export:
- IPTC ZIP — photos with embedded IPTC/XMP metadata. Compatible with most archival software and photo viewers.
- Lightroom ZIP — XMP sidecar files for direct import into Adobe Lightroom.
Exports run in the background. A status badge shows Queued → Rendering → Done. Download link appears when ready.
Common Questions
The AI extracted the wrong name. Can I fix it?
Yes — edit the People field manually and save. It becomes "manual" and persists through recomputes.
Can I see the original transcript?
Yes — go to the Responses tab to read full transcripts.
A photo has no responses.
Items with zero responses have empty metadata. You can type values in manually, or invite more contributors.